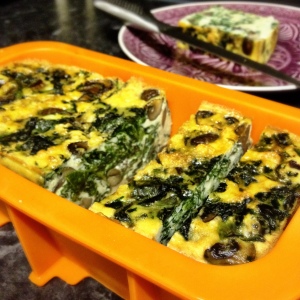
gluten and dairy free breakfast omelette loaf

breakfast omelette loafI am a firm believer that what we eat and put into our bodies has a huge effect on our health and wellbeing. Over the last year or so this has become ever prevalent in my own life. My boyfriend suffers from ankylosing spondylitis which can mean he’s often in a great deal of discomfort and pain, which is really hard to see.
Through hours of research on the web and reading various books – the overriding conclusion was that this condition, including thousands of others can be controlled and even cured through the correct diet. John decided to go gluten free over a year ago and this seems to have helped a little but the research hasn’t stopped and so, we’re now trying something new. I also suffer from constant back ache (only relieved from yoga and rest) and various other niggles but we’re hoping this new diet could help. We’re trying the Specific Carbohydrate Diet (SCD) – I’ll go into this into more detail in a another post but basically it means cutting out a crap load of different food varieties – including milk and other dairy products, wheat and grains, beans and potatoes. As you can probably guess it does make life a little hard to begin with (especially for a girl who loves a cuppa and a piece of toast!). Food now needs to be thought about well in advance and breakfast and lunches are easiest if prepped for the week ahead.

My main concern was breakfast, I would normally have museli (no milk allowed) or toast (no wheat allowed) or porridge (no oats allowed) – ok, time to get creative. This is where I decided it’d have to be egg based and came up with this, the breakfast omelette loaf. The loaf can be cooked at the beginning of the week (I do all my food prep on Sunday evening) and it can last until at least the Thursday.

You could add anything you want to it – I’ve been using mushrooms and spinach but you could add pancetta, cheese, onion, sweet potato or chorizo – anything you like! It’s so easy and really delicious, low fat and low carb, it’s great to slice up, wrap in foil and pop in your bag to take to work. I like it with a couple of slices of avocado – yum!

My instructions makes enough for 7 large slices in a normal sized loaf tin (I used a silicon loaf tin which works perfectly – no sticking!) but you could amend the size to whatever works for you and adjust the cooking times.

Ingredients
12x medium eggs (whisked together)
200g mushrooms – roughly chopped
8 balls of frozen spinach
Salt and pepper
Coconut oil

Instructions
1. Heat the oven to 180. To loaf tin grease with teaspoon of coconut oil.
2. Whisk 12 eggs in a large bowl, season and set to one side. To a pan on a medium heat, heat the coconut oil and then add the mushrooms – once these start to soften add the spinach. Add a lid and let the mushrooms cook and spinach defrost, this should take around 5 minutes, season. (this is where you could add any other tasty ingredients)
3. Once cooked spoon a layer of the mushroom and spinach to the loaf tin (try not to include any of the water that comes out of the mushroom and spinach) poor in some of the egg mixture so that it just covers the veg. Keep repeating this until all the mixture is used.
4. Pop in the oven for around 25 minutes. Keep checking regularly and take out as soon as the middle doesn’t wobble anymore. You can check if it’s not by popping a knife through the middle
the ultimate comfort snack – warm soft scotch egg

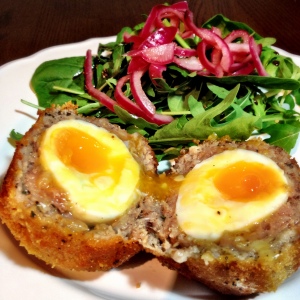
homemade scotch eggThe scotch egg has had a bad rap in the past, our association is often at petrol stations when you need that quick fix, dry rubbery meat with a hard boiled egg and grey yolk. Well, this is the exact opposite of that.

I don’t like to blow my own trumpet but this is bloody gorgeous and not as hard as you think. Crispy breadcrumb outer, moist tasty pork meat and then bite into a perfectly cook soft boiled egg with a gooey bright yellow yolk. How can you resist that?

I served this with some simple salad leaves and homemade pickled red onion. A proper British pub snack at home.

I make this as easy for myself as possible and instead of using pork mince or plain sausage meat I actually just use my favourite sausages and squeeze out the meat from the casing.

4 Scotch eggs

Ingredients
5 medium free range eggs
6 sausages (any medium sized sausages, have a play around with different flavours)
3 tbspn of golden breadcrumbs (of course you can make your own using stale bread too but these work really well)
3 tbspns of plain white flour
coconut oil for frying

Instructions

  1. Put the oven on to 190. Into a sauce pan add four of the eggs into cold water and put onto a low heat. Once it comes to the boil cook the eggs for 3 and half minutes. As soon as they’re done run them under cold water and leave submerged.
  2. Whilst the eggs are cooking squeeze out the sausage meat from the casing into a large bowl – here you can add any spice or herbs you like. I added a few finely chopped chives but paprika, garlic or nutmeg could work really well too. Mixe the sausage meat up until it’s in a large ball, and then separate this into four equal parts.
  3. Time to peel the eggs. This is the trickiest part of the recipe as the eggs are still lovely and soft in the middle. Take care doing this – I find keeping the eggs submerged in the cold water whilst peeling helps. Once peeled pat dry and place to one side.
  4. To three small bowls, crack an egg to one and whisk, to another add in the flour and to the last add the breadcrumbs – here you’ve set up yourself a little conveyor belt.
  5. Flour your hands. Take one of the sausage meat balls into the palm of your hand, then flatten out into a oval patty, place an egg in the middle and wrap the patty around the egg. Make sure that there are no holes in sausage meat and take your time to do so. Do this with all eggs.
  6. With each egg, now roll first in the flour, then the egg and finally the breadcrumbs. Making sure to cover the whole ball in breadcrumbs.
  7. In a deep non-stick pan add the coconut oil and let it heat up on a medium heat. Add the scotch eggs. Cook for around 5-6 minutes whilst turning them to make sure they are golden on sides. These will be almost cooked but the egg may be cold in the middle so once golden pop these onto a baking tray and pop into the oven for 4 minutes.

These are ready to served! They’re amazing warm but you could of course let them go cold and eat any time. I had them with homemade red pickled onion that went perfectly but I’m sure there’s other perfect accompaniments, any suggestions?


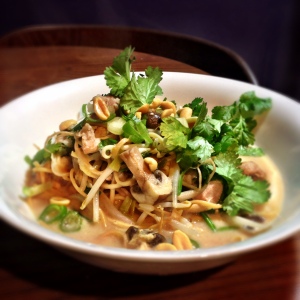
thai chicken-noodle feel good soup

thai chicken and coconut broth The winter is drawing in and the snotty noses and coughs join it, so just like when you were a kid I have a lovely chicken soup that is bound to make you feel better, in fact there’s even been some evidence of chicken soup having some healing powers for that common cold!

When I was younger I had a neighbor that used to bring round homemade chicken soup whenever I was ill and it always made me feel better… ok maybe it didn’t fix me completely but it certainly gave me a nice warm hug in a bowl.

I see this recipe as the grown up version with a ginger kick and luxurious coconut milk.

For 3 large servings.

Ingredients
5 chicken thighs – skinless and boneless – cut into bize size chunks
200g of mushrooms – cut in half
2 inches of ginger – grated
2 spring onions – finely chopped
juice of 1 lime
1 stick of lemon grass – bruised
2 tbsps of fish sauce
large bunch of coriander – finely chopped
1 can of good quality coconut milk
noodles of your choice –  I used egg but if you wanted this to be gluten free you could use rice
2 tsp coconut oil

to garnish (i think this makes the dish, so don’t leave this bit out!)
handful of peanuts
1 spring onion finely chopped
coriander leaves

Instructions
1. To a deep non stick pan heat the coconut oil, once hot add the ginger, lemon grass and spring onion and cook until they begin to soften. Add the chicken and cook until it starts to get a little colour. Then add the mushrooms. Cook until these begin to soften – around 5 minutes.
2. Add the fishsauce and turn the heat down. Add veg stock, coconut milk, lime juice and coriander. Let this simmer for 3 mins.
3. Add your noodles and make sure that they’re covered by the broth. If there doesn’t seem to be enough, add a little hot water. Once the noodles are soft it’s time to serve.
4. Add the noodles and broth to a large bowl. Sprinkle over the spring onion, peanuts and coriander leaves. Serve with a wedge of lime.

harissa chicken wraps

Harissa chicken wrapI was umming and arring as to whether to blog about this. Is a chicken wrap really worthy of a blog post? In this instance yes, yes it is! When you’re not in the mood or pushed for time but still want something healthy and tasty, this is the perfect meal. You could even make these the night before and have them for lunch the next day.

I love harissa paste – its flavour is intense, fragrant and punchy. I use it in a lot of my cooking. I prefer to use chicken thighs in this too, they stay nice and moist and personally just prefer the taste of the darker meat but of course breast would work fine too.

I think the pomegranate seeds make this dish, little crunchy sweet burst of flavour are great in breaking up that intense fiery harrisa. I’ve also made a vegetarian version of this, replacing the chicken with chunks of halloumi cheese which was absolutely gorgeous too!

The only cooking you’ll need to do is of the chicken – unless you want to be fancy and make your own wraps!

4 wraps

Ingredients
4 chicken thighs – cut into bite sized chunks
2 tsp of harissa pasteharrisa wrap with avocado
Juice of half a lemon
1 avocado – sliced into bite sized chunks
Half a small red onion – very thinly sliced
60g feta cheese – crumbled
Pomegranate seeds
Couple of handfuls of rocket leaves
4 medium sized wraps
4 tsp tahini paste
bunch of coriander

Instructions
1. To a bowl add the chicken, harissa paste and lemon juice. Leave to marinade for 10 minutes or so.
2. To a large non stick pan, add the coconut oil and then the chicken on a medium heat. Stir once in a while to prevent sticking.
3. As the chicken cooks, get all your other ingredients ready and prepped. To each wrap add a teaspoon of tahini and spread.
4. Add the rocket, avocado, onion and feta cheese.
5. The chicken should take around 10 minutes to cook – once done add to the wrap and sprinkle of the pomegranate seeds and corinader.

That’s a wrap! (sorry)

warm salad of fig, sweet potato and feta with honey and walnut

warm sald of fig, sweet potato and fetaNot a very catchy title is it? But I just couldn’t decide which ingredients to include in it because I love them all so much! The weather can’t make up its mind at the moment here in London, one minute it’s glorious sunshine the next I’m turning on the heating in my little flat! So what does one eat in such climates?! I’ve got just the thing – a salad (for the summer part) and warmth (for the winter part) – this delicious warm salad took inspiration from a dish that my dad cooked me from an Ottolengi cook book but I’ve adapted and added my own twist.

This salad is the perfect mix of sweet and salty. Sweet figs and honey with salty lardons and feta – it feels so luxurious to eat. And then there is creamy soft sweet potato with crunchy, almost slightly bitter walnut is just yummy. I really love this salad and I think you will too.

If you’re vegetarian just leave out the pancetta and this would work just as well. You could also try different cheeses – goats cheese works really well or why not crumble over some wensledale!

feeds 2 people

Ingredients
2 small-medium sweet potatoes – skin on, cut into small wedges
4 spring onions – cut in half length ways and then in half
2 garlic cloves – crushed
200g smoked lardons
3 medium sized fresh figs – stalk removed and quartered
Good handful of walnuts
60g feta cheese – crumbled
1 tbsp of runny honey
Olive oil

Preheat the oven to 180.warm sald of fig, sweet potato and feta

Instructions
1. Add the sweet potato wedges to a large baking tray and drizzle with olive, shake to coat. Add to the oven.
2. Add the lardons to a large non stick pan on a medium heat – let the fat start crisp up and go golden. Add the garlic and spring onions – continually stir and cook until onions are soft. Remove from heat and cover with lid to keep warm.
3. After 20-25 minutes check the potatoes – these should almost be done. Add the figs to the baking tray and return for 5 minutes.
4. To serve add the potatoes to a plate, and then layer the spring onion and lardon mix over the potatoes. Then add the figs, crumble the feta over and then the walnuts. To finish drizzle runny honey all over this will combine everything.

Figs are in season at the moment and the market is full of them – they’re my new love and I’ve been trying out loads of different recipes recently. Any other great fig recipes I should try?

Guess who’s back? Back again…

Biggie the PugNope I’ve run away with the circus or gone to prison or decided do-away with all technology and go live on a deserted island (although this does cross my mind daily!)… I basically got a pug puppy. To be more precise I got Biggie on the left there! It’s been my lifelong dream to have one of the squidgy little faced puglets and I finally took the plunge! It’s amazing but oh so time consuming and tiring – and so because of that (plus not having internet for a month!) I’ve been quiet on the blog front. To be honest I’ve barely found the time to cook and when I have it’s been quick basic stuff that just isn’t blog worthy.


I’ve been back in the kitchen the last couple of weeks thouBiggie in a hoodygh and have some really delicious recipes that I’m going to share with you guys. But in the mean time let’s take a take a few moments to appreciate the cuteness of Biggie.


Let the Om Nom Nomming commence once again!

sweet and sticky plum and ginger chicken

plum and ginger chickenLet me say this now. If there is only one recipe you try from my blog – please, please make it this one. It’s so bloody delicious and moreish. Not blowing my own trumpet or anything! I had a plum and chicken dish at my friends house a few months ago and this is my imagined version. Also, apologies about the awful photos, I just couldn’t wait to eat this so rushed the pics but believe my words – you will love it. I plan to make it for my next dinner party and can’t wait to eat it again.

It’s sweet, sticky, spicy and sour all at once. The plums break down and turn into a gloopy delicious sauce. The ginger and chilli add a spicy fragrant back note and the soy sauce adds the perfect salty balance for the sweet and sour plums. I served it with plain boiled rice and some quickly stir fried white cabbage.

Ingredients
6 boneless and skinless chicken thighs
2 inches of ginger – coarsely grated
4 garlic cloves – thinly sliced
3 spring onion – sliced length ways and then in half
half a large hot red chilli – sliced finely
3 tsp of ground 5 spice
8 small plums – halved and destoned
3 tbsp soy sauce
2 tsp dark brown sugar
salt and pepper

Instructions
1. Season the chicken thighs and add to a hot large non stick pan. Cook on a high heat for 2-3 minutes on each side or until golden.
2. Sprinkle over the 5 spice, garlic, spring onions, ginger and chilli. Give it a stir, turn the heat down to a medium and add a lid. Cook for a further 6 minutes.
3. Add the soy sauce, plums and sugar. Stir again and put the lid back on. Cook for another 5 minutes until the plums have become very soft and the sauce is bubbling and sticky.

Serve immediately and enjoy!

Les Greedy Cochon at Camden Town Brewery

The Greddy RacletteCheese. I love the stuff. Brie, goats, cheddar, mascarpone, Gouda, parmesan, the list goes on and on and on… So when I saw this ‘all you can eat’ cheesy supper club, I just couldn’t not go. Before I continue, let me just say the pictures don’t do it justice at all! My camera was not happy this day.

Les Greedy Cochon or Greedy Raclette set up shop in my favourite Kentish Town watering hole for the evening, Camden Town Brewery. Set under the arches of Kentish Town West station, this is a great little bar to visit whether you’re there for the cheese or not! You can spend an evening there sampling all of their delicious beers in a great location.

We arrived and were greeted with a beer of our choice, a perfect start. We were quite early so sat and ate the table snacks provided and sipped our beer happily.

There were around 20 of us, all seated together across two long wooden tables. We immediately realised we’d perched ourselves right in the corner at the far end and started to worry we might miss out on some of the cheesy goodness as we were so far away from the magical cheese heater but our fears were squashed pretty fast.

Normally when you’re having raclette, you’d be in the Alps in a little Swiss restaurant with your very own raclette machine heating up your wheel of cheese on your table. We weren’t quite lucky enough to have our own wheel of cheese each or a raclette machine (which at first I was a little disappointed because heating up and scraping your bubbling cheese off is half the fun!) but the staff that were looking after us did a great job. There were two raclette machines that were continuously heating up the cheese and the staff were running back and forth bring us our melted, creamy, nutty flavoured cheese.

Along with each plate of cheese they’d bring us two or three perfectly cooked new potatoes. On the table there were pickles –The Greddy Raclette tiny onions and gherkins that cut through the rich creamy cheese perfectly. Also on the table was a choice of cured meats. These were refuelled as many times as we asked (which was a lot!) and the same with the pickles.

Food wise – that’s all there was but that’s all you needed. This was sticking to the traditional way that you’d have raclette in Swiss Alps. The main star is the cheese. And a star it was!

I think I managed 6 plates of cheese (and the rest!) in the end and the staff would’ve quite happily kept filling my plate. I had to roll home as it was though so it was time to stop eating!

I would definitely recommend this to anyone who has a love of cheese and simple good food.

I found this night through The Grub Club which I am loving – there’s so many quirky and interesting foody events and supper clubs happening all over London. Check it out to see when The Greedy Raclette are holding their next event.

fresh ginger and carrot slaw

carrot and ginger slawI’m alive! I can’t believe it’s been two months since I last posted. Sorry about that. There are a number of reasons for this:

  • I went on holiday to Sri Lanka (more news on this soon!)
  • I was saving for said holiday, so didn’t eat out for a couple of months – no reviews.
  • I was saving for holiday so ate really basic non-blog worthy food.
  • I just got a bit lazy. Ooops.

But I’m BACK and this recipe is perfect for my post holiday blues. Simple, quick and healthy, just what I need after two weeks of over indulging and not having to cook anything.

This salad/slaw is so yummy and so versatile. I’ve had it with roasted chicken, grilled halloumi, sweet potato chips and more but I think it’d go with almost anything.

It’s fresh and zingy from the lemon and ginger (classic combo!) but the poppy seeds add great texture and a real earthy savoury element that balances perfectly.

2 large portions (why are my portions always large?!)

Ingredients carrot and ginger slaw
1 large carrot – julienned with julienne peeler or grated
Half a small red cabbage – finely shredded or use a mandolin
Three spring onions – finely sliced
Thumb sized piece of ginger – very finely grated
Juice of half a lemon
Large tablespoon of poppy seeds
Seasoning

Directions
1. Add all the carrot, cabbage and spring onion to a large bowl and mix well.
2. Add the ginger, poppy seeds, lemon juice and seasoning and mix again, this time using your hands and scrunch it all together. This really helps to bind it all together.

How easy was that! I love trying out new slaw variations. Do you have any recipes you think I should try?

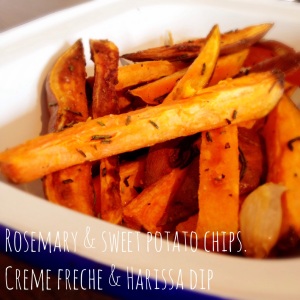
rosemary sweet potato chips with creme fresh & harissa dip

rosemary sweet potato chipsSalty, rosemary infused, crispy, sweet potato chips. With a dip that’s both fresh and spicy at the same time. Yummolicious. The smell of these cooking is just amazing, the delicate fragrence of the rosemary and the caramel sweet smells from the sweet potato fill my tiny flat.

Now, I’m not saying this is the most innovative of recipes or thinking it will win me any awards. But I can tell you it’s my favourite hot snack when at home. It’s quick, easy, healthy and hits the spot every time.

These are so good on their own, the rosemary goes lovely and crispy which are little explosions of flavour in your mouth. Or these could be accompaniment to another dish.

Ingredients
Chips
1 large sweet potato
2 tsp Himalayan  salt
3 sprigs of fresh rosemary – leave taken off and finely choppedcreme fresh and harissa dip
4 garlic cloves – skin left on
3 tsp coconut oil

Dip
1 tbsp creme fresh
2 tsp of Harissa paste
2 tsp lemon juice

Instructions
Heat the oven to 200

1. Pop a baking tray in the oven. Leaving the skin on, cut the sweet potato into chunky chips. Take out the tray and add the coconut oil so that it melts first, chips, sprinkle over the salt and the rosemary. Give everything a good shake and ensure everything is coated. Pop in the oven for around 25 mins or until crispy.
2. Whilst your chips are in the oven. Add the creme fresh, Harissa and lemon juice to a small bowl. Marble the ingredients together but don’t fully mix. This will give the fresh, cool taste against the fragrant spice.
3. Take out the chips and squeeze the garlic from their skins and add back to the chips. Serve immediately with the dip.